Ultra Cheesy Juicy Lucy Recipe
By
Michelle McGlinn
Updated: June 10, 2025 10:30 am EST

Michelle McGlinn/Chowhound
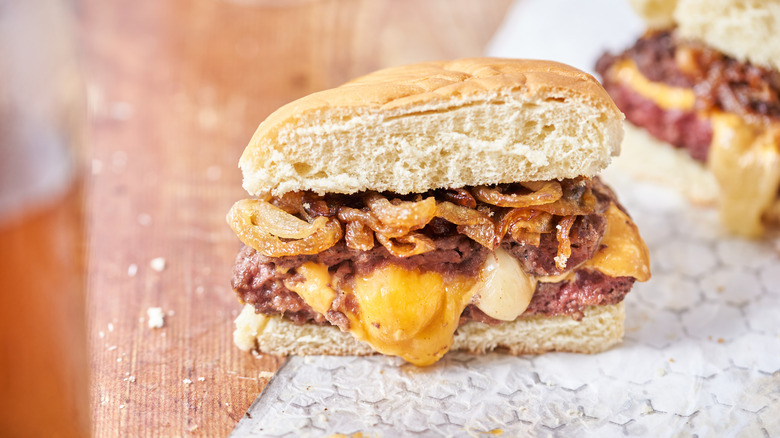
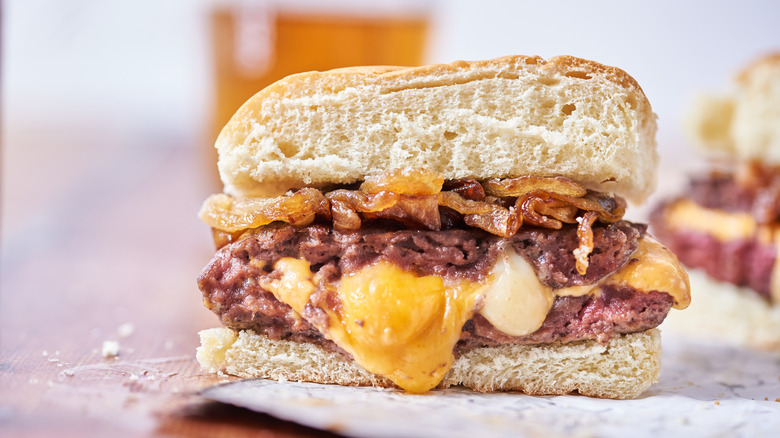
Legend has it that one random evening in south Minneapolis a hungry patron at Matt’s Bar asked for “a slice of cheese between two patties” which was honored begrudgingly by the cooks and served as requested. The two patties, of course, were served between buns and soon became Minnesota’s most famous burger, allegedly named after said patron bit into the sandwich and, cheese running down his chin, declared it was one “juicy Lucy!“ That is, according to Thrillest, just one of many theories circulating south Minneapolis, but one thing remains the same: the Juicy Lucy recipe.
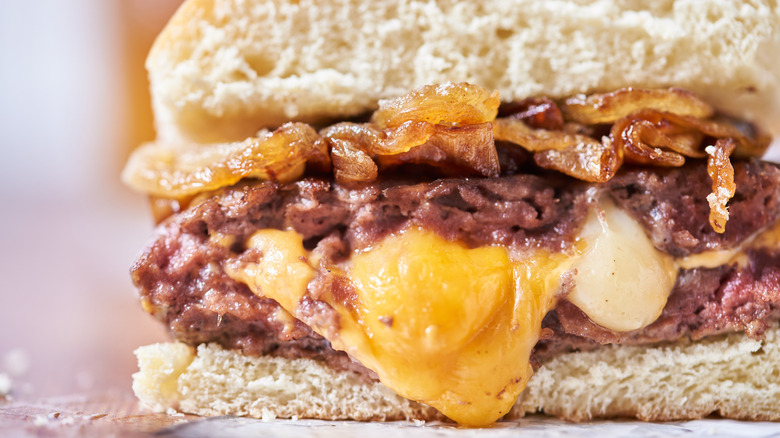
A Juicy Lucy is a fairly simple hamburger that only requires one technique: stuffing with cheese. It’s easier than it sounds, and like that famed original request, is basically just 2 patties with cheese in the middle. The cheese melts while the patty cooks, so when the burger is finally eaten, the cheese oozes out. Sure, you could just have a cheeseburger, but what fun would that be?
In this recipe written with developer Michelle McGlinn, we take inspiration from the friendly neighbors of the east and stuff our Juicy Lucy with cheese curds for an ultra cheesy Juicy Lucy. After all, Wisconsin is “America’s dairyland” — surely we should trust their cheese choices. If you’ve ever had fried cheese curds, you’ll already know how gooey, melty, and delicious this curd-stuffed burger is – and how stuffed you’ll be after eating it, too.
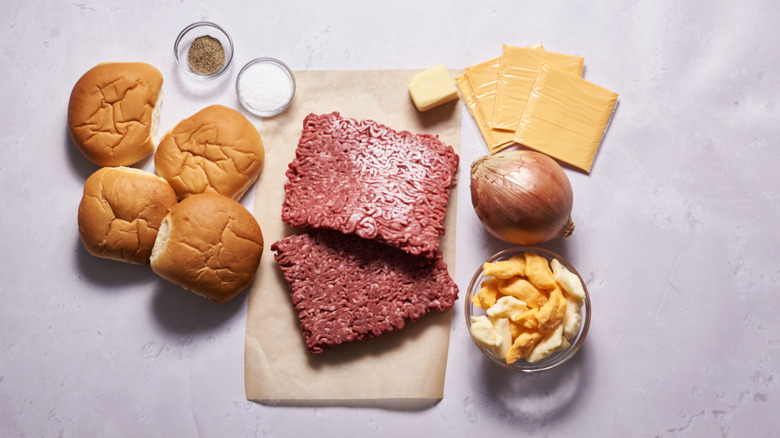
The ingredients you need for an ultra cheesy Juicy Lucy
Michelle McGlinn/Chowhound
The original (or, one of the said originals) Juicy Lucy had only grilled onions on it, a tangy complement to the excessive amount of cheese. This recipe caramelizes the onions for a sweeter taste, and to do that you’ll just need butter, a large Spanish or yellow onion, and some salt. Grab a few extra pinches of salt and some pepper for the burgers, then get ground beef, American cheese, and cheese curds. Cheese curds are pieces of baby cheddar that haven’t been aged at all, and thus are squeaky (literally), squishy, and very melty when cooked. To build the burgers from there, you’ll just need 4 sturdy hamburger buns.
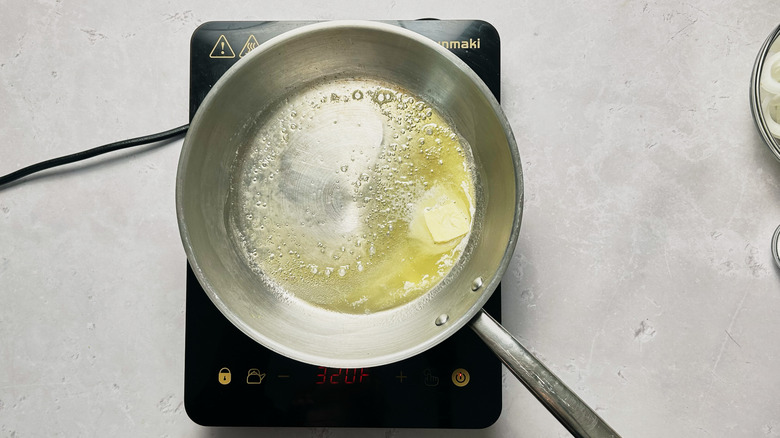
Step 1: Melt butter
Michelle McGlinn/Chowhound
Melt 2 tablespoons butter in a nonstick skillet over medium-low heat.
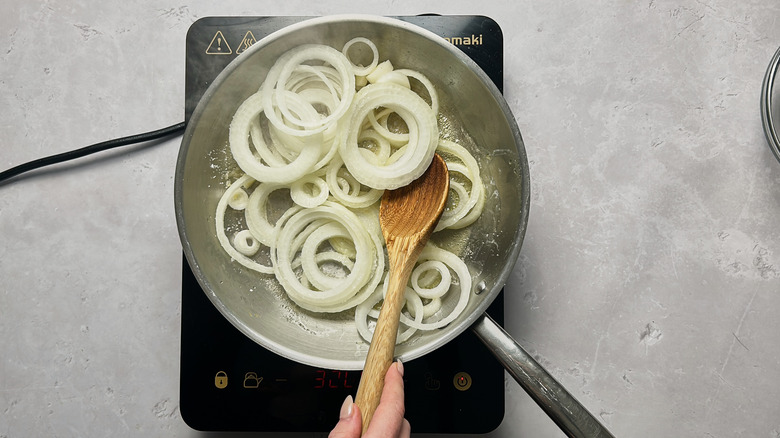
Step 2: Add onion slices
Michelle McGlinn/Chowhound
Once the butter is melted, add onion slices and 1 teaspoon of salt.
Step 3: Caramelize the onions
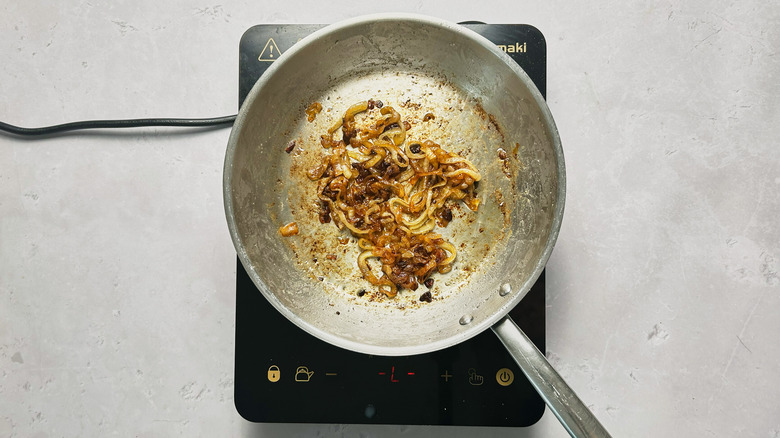
Michelle McGlinn/Chowhound
Cook, stirring occasionally, until onions are deeply caramel brown, about 40 minutes. If the onions are turning dark brown, turn the heat to low.
Step 4: Prepare the patties
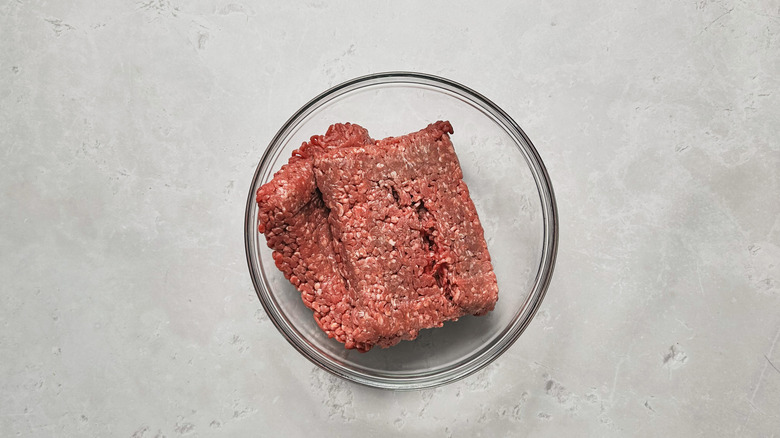
Michelle McGlinn/Chowhound
While the onions cook, prepare the hamburgers. Add the ground meat to a large bowl.
Step 5: Season the meat
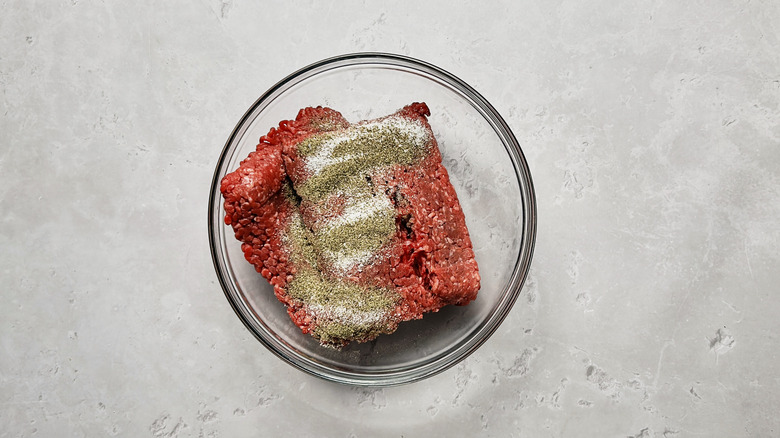
Michelle McGlinn/Chowhound
Season the meat with the remaining 2 teaspoons salt and pepper, and mix to combine.
Step 6: Divide into 4 sections
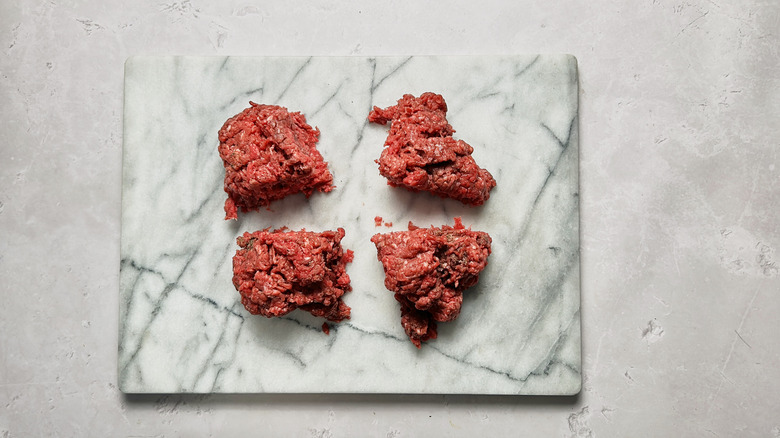
Michelle McGlinn/Chowhound
Divide the beef into 4 sections.
Step 7: Divide into 8
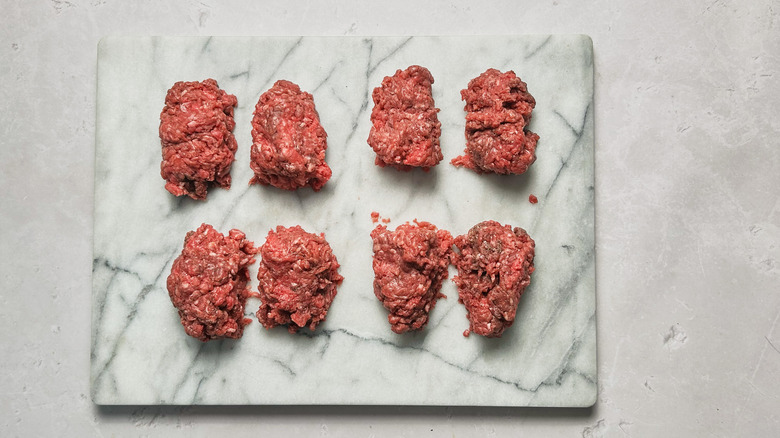
Michelle McGlinn/Chowhound
Divide each section in half.
Step 8: Shape into patties
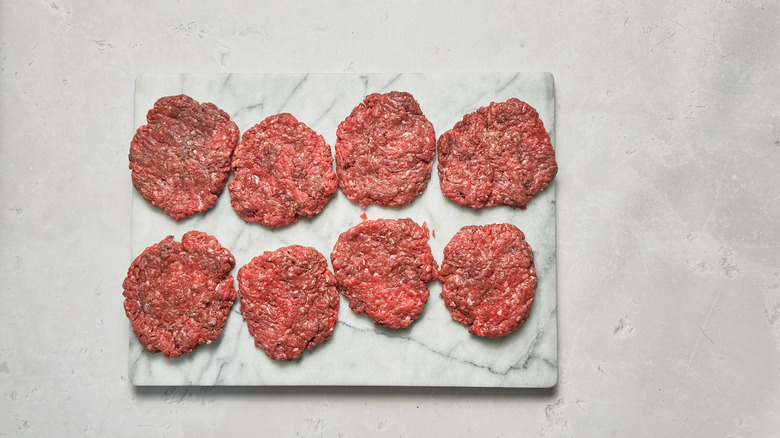
Michelle McGlinn/Chowhound
Form large patties out of each section.
Step 9: Add American cheese
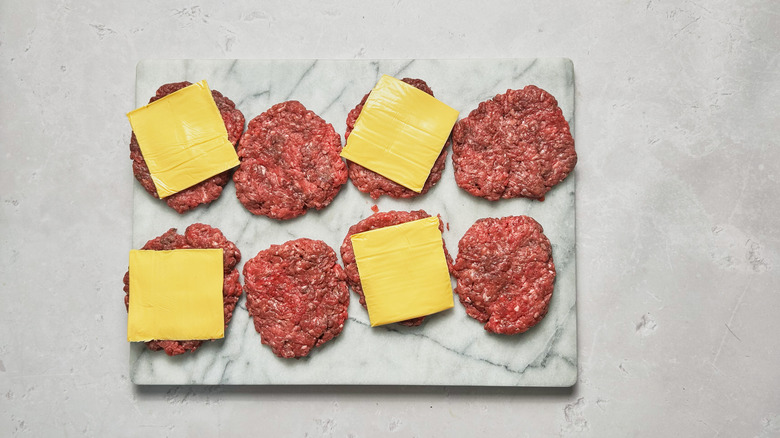
Michelle McGlinn/Chowhound
Add a slice of cheese to 4 patties.
Step 10: Add cheese curds
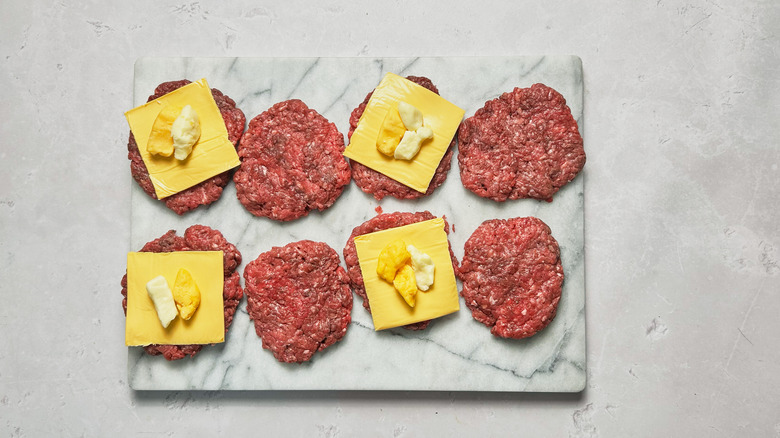
Michelle McGlinn/Chowhound
Add 3 cheese curds to the center of each slice of cheese.
Step 11: Top and seal the patties
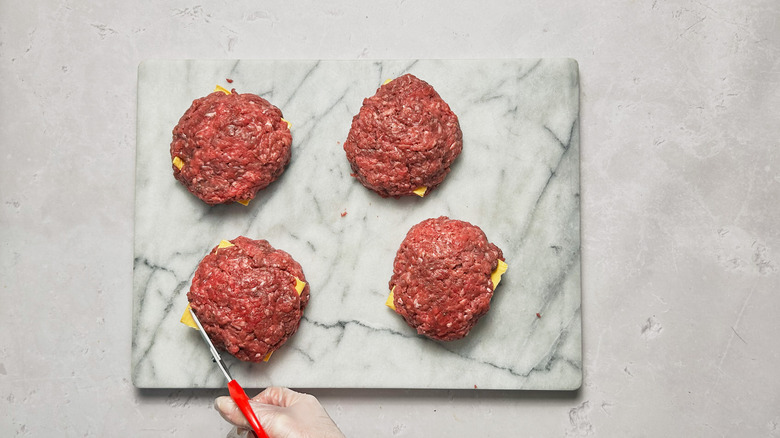
Michelle McGlinn/Chowhound
Top the patties with the other 4 patties. Press down and pinch the sides to close.
Step 12: Heat butter
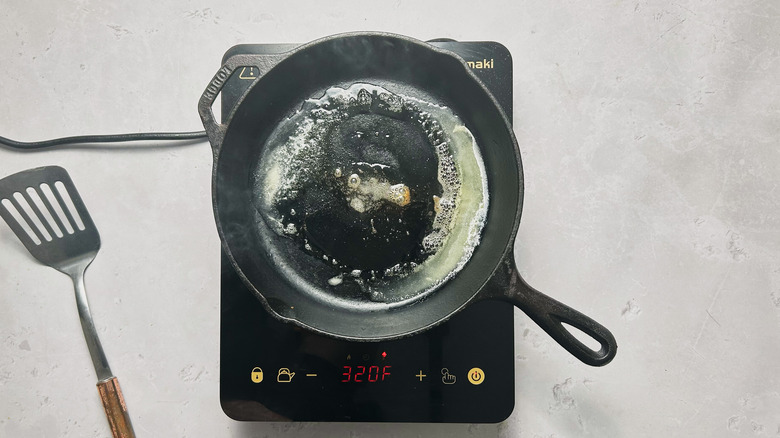
Michelle McGlinn/Chowhound
Heat butter in a large skillet over medium heat.
Step 13: Cook burgers on one side
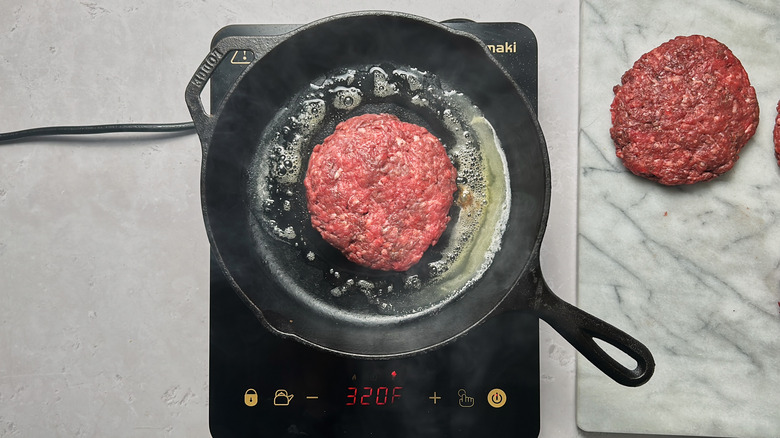
Michelle McGlinn/Chowhound
Add the burgers to the skillet and cook, pressing down gently, until deeply browned, about 4-5 minutes.
Step 14: Flip and brown the other side
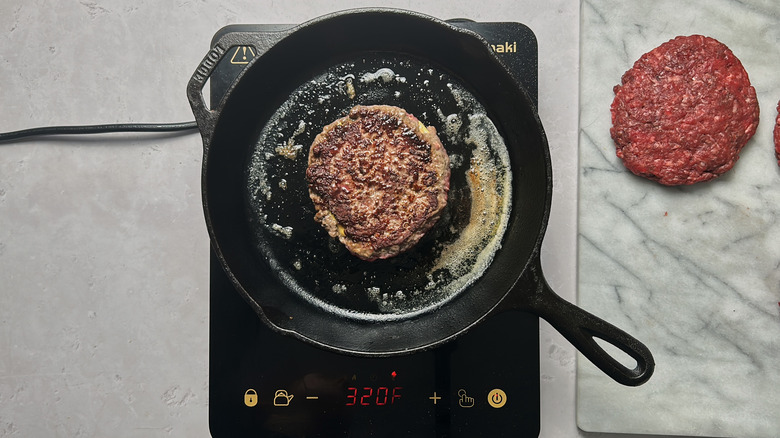
Michelle McGlinn/Chowhound
Flip the burgers and cook, pressing down gently, until deeply browned, another 4-5 minutes.
Step 15: Serve on buns

Michelle McGlinn/Chowhound
Top the burgers with caramelized onions and serve on a bun.
What to serve with a Juicy Lucy burger
- Air-Fryer Homemade Mozzarella Sticks Recipe
- Custard-Filled Boston Cream Donut Recipe
- Roasted Strawberry And Basil Lemonade Recipe
- Extra Cheesy Hasselback Potatoes Recipe
- Italian Deli Grinder Salad Recipe
- Loaded Baked Potato Cheese Ball Recipe
Ultra Cheesy Juicy Lucy Recipe
5 (34 ratings)
Print
In this recipe, we take inspiration from the friendly neighbors of the east and stuff our Juicy Lucy with cheese curds for an ultra cheesy Juicy Lucy.
Prep Time 15 minutes Cook Time 48 minutes servings 4 Servings
 Total time: 1 hour, 3 minutes
Ingredients
- 4 tablespoons butter, divided
- 1 large Spanish onion, thinly sliced
- 3 teaspoons salt, divided
- 2 pounds ground beef
- 1 teaspoon pepper
- 4 slices American cheese
- 12 cheese curds
- 4 hamburger buns
Directions
- Melt 2 tablespoons butter in a nonstick skillet over medium-low heat.
- Once melted, add onion slices and 1 teaspoon of salt.
- Cook, stirring occasionally, until onions are deeply caramel brown, about 40 minutes. If the onions are turning dark brown, turn the heat to low.
- While the onions cook, prepare the hamburgers. Add the ground meat to a large bowl.
- Season the meat with the remaining 2 teaspoons salt and pepper and mix to combine.
- Divide the beef into 4 sections.
- Divide each section in half.
- Form large patties out of each section.
- Add a slice of cheese to 4 patties.
- Add 3 cheese curds to the center of each slice of cheese.
- Top the patties with the other 4 patties. Press down and pinch the sides to close.
- Heat butter in a large skillet over medium heat.
- Add the burgers to the skillet and cook, pressing down gently, until deeply browned, about 4-5 minutes.
- Flip the burgers and cook, pressing down gently, until deeply browned, another 4-5 minutes.
- Top the burgers with caramelized onions and serve on a bun.
Nutrition
| Calories per Serving | 1,225 |
| Total Fat | 91.8 g |
| Saturated Fat | 43.9 g |
| Trans Fat | 2.7 g |
| Cholesterol | 288.2 mg |
| Total Carbohydrates | 30.6 g |
| Dietary Fiber | 1.6 g |
| Total Sugars | 5.2 g |
| Sodium | 1,121.6 mg |
| Protein | 67.3 g |
The information shown is Edamam’s estimate based on available ingredients and preparation. It should not be considered a substitute for a professional nutritionist’s advice.
![]() Rate this recipe
Rate this recipe
How do I cook a Juicy Lucy all the way through?
Michelle McGlinn/Chowhound
Burgers don’t take very long to cook, especially if you like them medium to rare. To properly melt the cheese, the burgers need to cook long enough to warm the middle, which can mean that the patties are cooked well past medium. The original, smash-burger-like Juicy Lucys of Minnesota are sometimes avoided for this reason — they’re cooked to a crisp, leaning on the melty cheese for moisture. While there’s something tasty about the char of a freshly grilled burger, it’s not always what you want at home.
These massive quarter-pound burgers take 4-5 minutes per side to get to a deep brown crust with medium rare insides. Leave them for a few extra minutes to achieve medium, and don’t be afraid to slightly overcook the patty — the cheese will start to ooze out before you get to well done. To expedite the process (especially if your skillet can’t fit four at a time), heat the patties in a warm oven to finish cooking all the way through.
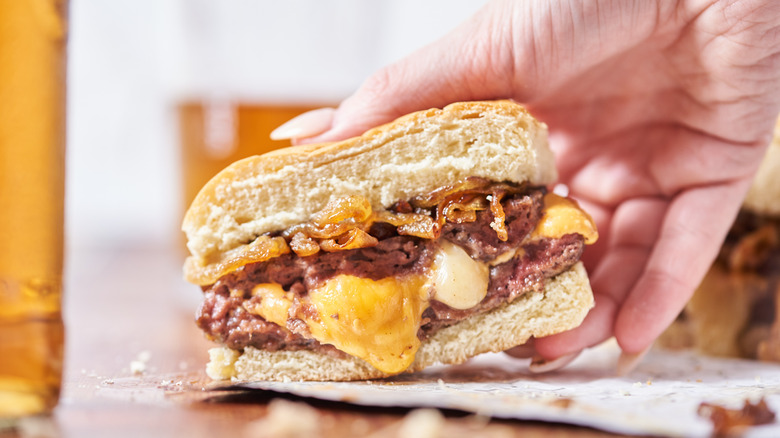
How do I serve and store a Juicy Lucy?
Michelle McGlinn/Chowhound
A Juicy Lucy should be eaten immediately while the cheese is still hot and melty. If you’re making these on the grill, simply add to buns and serve right away. If you’re making these on the stove and need to work in batches, keep them warm on a very low setting in the oven until ready to serve. The cheese stays gooey for about 5 minutes before it begins to solidify again as it returns to room temperature.
The same happens to leftovers, which need to be stored in the refrigerator. When you’re ready to eat what you’ve stored in an airtight container in the fridge, reheat it using the microwave or oven until hot, working in increments to avoid the cheese overheating and spilling out of the patty. A better option might be to simply make what you know you’ll eat and save the raw ingredients to cook up fresh later.